Edit in Blender
Take a model to Blender (or Maya, 3ds Max, Cascadeur, any tool that reads and writes glTF) and bring it back. The object keeps its place, flows, physics and clips. There is nothing to install.
The round trip
- Right-click the object ▸ Mesh ▸ Edit in Blender…, or use Properties ▸ Model.
<object name>.glbdownloads, with its rig, weights and clips if it is animated, and a short card shows these steps. - In Blender: File ▸ Import ▸ glTF 2.0, pick the file, and make your edits. For a model without a rig, use Object ▸ Apply ▸ All Transforms (Ctrl+A) before exporting.
-
File ▸ Export ▸ glTF 2.0 with these settings:
Setting Value Format glTF Binary (.glb) Include Custom Properties: this keeps the link to the object Transform +Y Up Data ▸ Mesh Apply Modifiers Animation On, for a rigged model, so its clips go along Units Metres (Scene ▸ Units ▸ Unit Scale 1.0) -
Drop the exported file anywhere in theprototype. It recognises the object and asks Update "
"? , with no need to select anything. If you left Custom Properties off, select the object, drop the file on it and choose Replace.
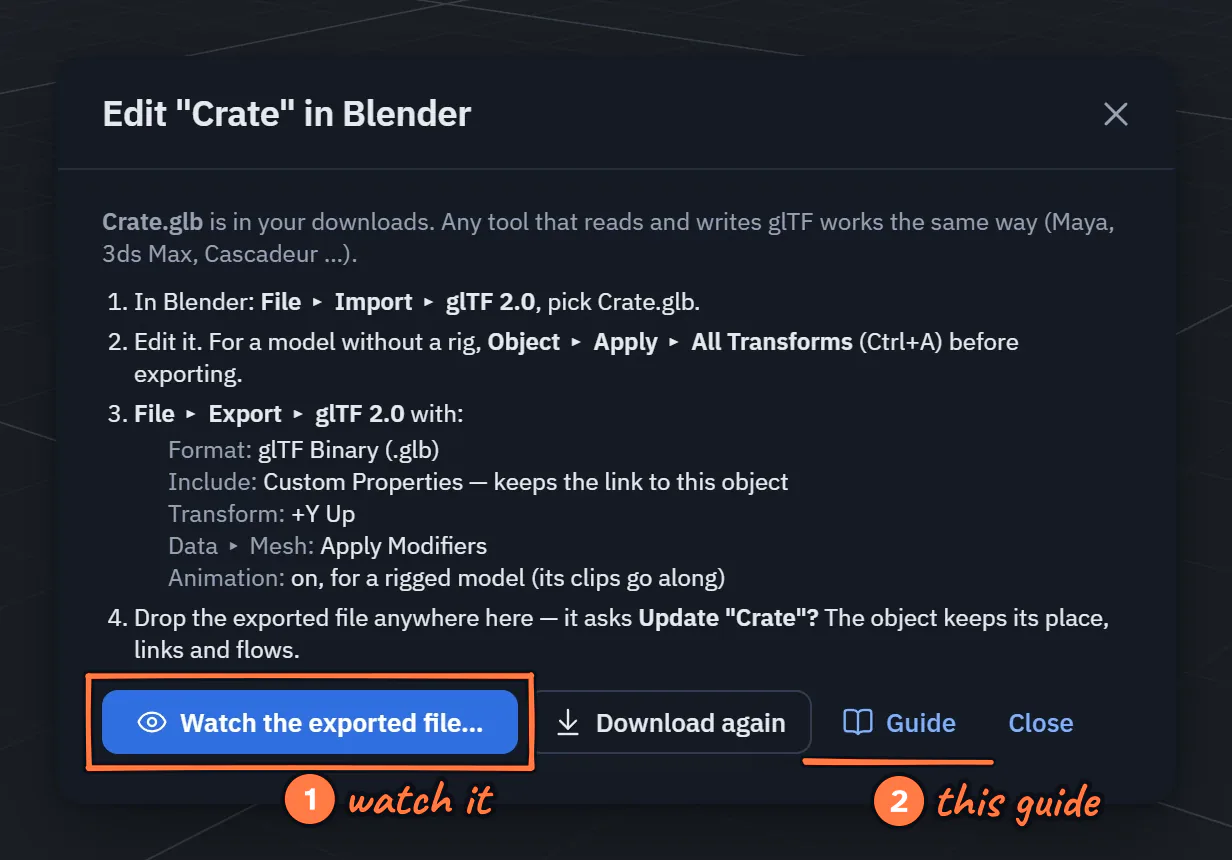
The Edit in Blender card, after the model downloads.
- Watch the exported file…: pick what Blender saves, and every save updates the object — watch it.
- Guide opens this guide.
Watch the file
In Chrome or Edge on a computer, the card has Watch the exported file…. Pick the .glb you export from Blender, and each
time you export again theprototype offers Reload, or Always reload to update on every save. Properties ▸ Model shows
the watched file with Reload automatically and Stop.
Other browsers can drop the file instead. The watch is on your computer only and ends when you reload the page. The update itself reaches everyone.
Replace a model from any file
Replace model… swaps an object's model for another file, whether or not it came from Edit in Blender.
- Where: right-click an imported model ▸ Mesh ▸ Replace model…, or Properties ▸ Model ▸ Replace model… (the only place for a single primitive such as a box). Or drop a model file onto the selected object and choose Replace. Choose Add as a new object for the old behaviour, and tick Remember for this session to stop being asked until you reload.
- Formats:
.glb,.gltf,.vrm,.fbx,.stl, and.obj(pick its.mtland textures along with it). - What stays: the object itself: its name, position, rotation, scale, its parent and place in the object list, its flows and every flow node pointing at it, behaviours, physics, colliders, notes, and materials you changed in theprototype, on the part with the same name. Only the model changes.
- Undo: one Ctrl+Z puts the old model back for everyone. The new model reaches every peer and anyone who joins later.
- Limits: a replace is refused while a simulation runs and while someone else is editing the object.
Animations
A clip the old model had and the new file lacks is kept when every bone it moves exists in the new model, matched by bone name, so re-rigging or fixing weights in another tool does not lose it.
- A clip the new file has under the same name wins.
- A clip that names a bone the new model lacks is dropped. The message after the replace lists what was kept and dropped.
- Clips inside the old model's file need a
.glbreplacement, because they are written into the new file so everyone gets them. .tpanimclips follow the same rule and stay separate files; a humanoid clip stays when the new model has humanoid bones. A dropped one comes back with Ctrl+Z.
Checks before it is placed
If the new model looks off, theprototype says so and offers a one-click fix, or Replace as it is:
| It looks like | The fix |
|---|---|
| About 100× larger or smaller than the model it replaces (the centimetre / metre mix-up, common with FBX) | Scale by 0.01 (or 100) |
| Lying on its side (exported Z-up) | Stand it up |
| Transforms not applied (a scale or a quarter turn left on the file's root) | Apply transforms for models without a rig; for a rig, apply them in your tool and export again |
Earlier versions
Ctrl+Z right after an update brings back the previous one, and earlier versions come back from checkpoints.
Let an agent do it
Claude Code can make the whole trip for you: see the Agents + Blender recipe.