Give the AI pictures and shaders
Three ways to give the app more than words:
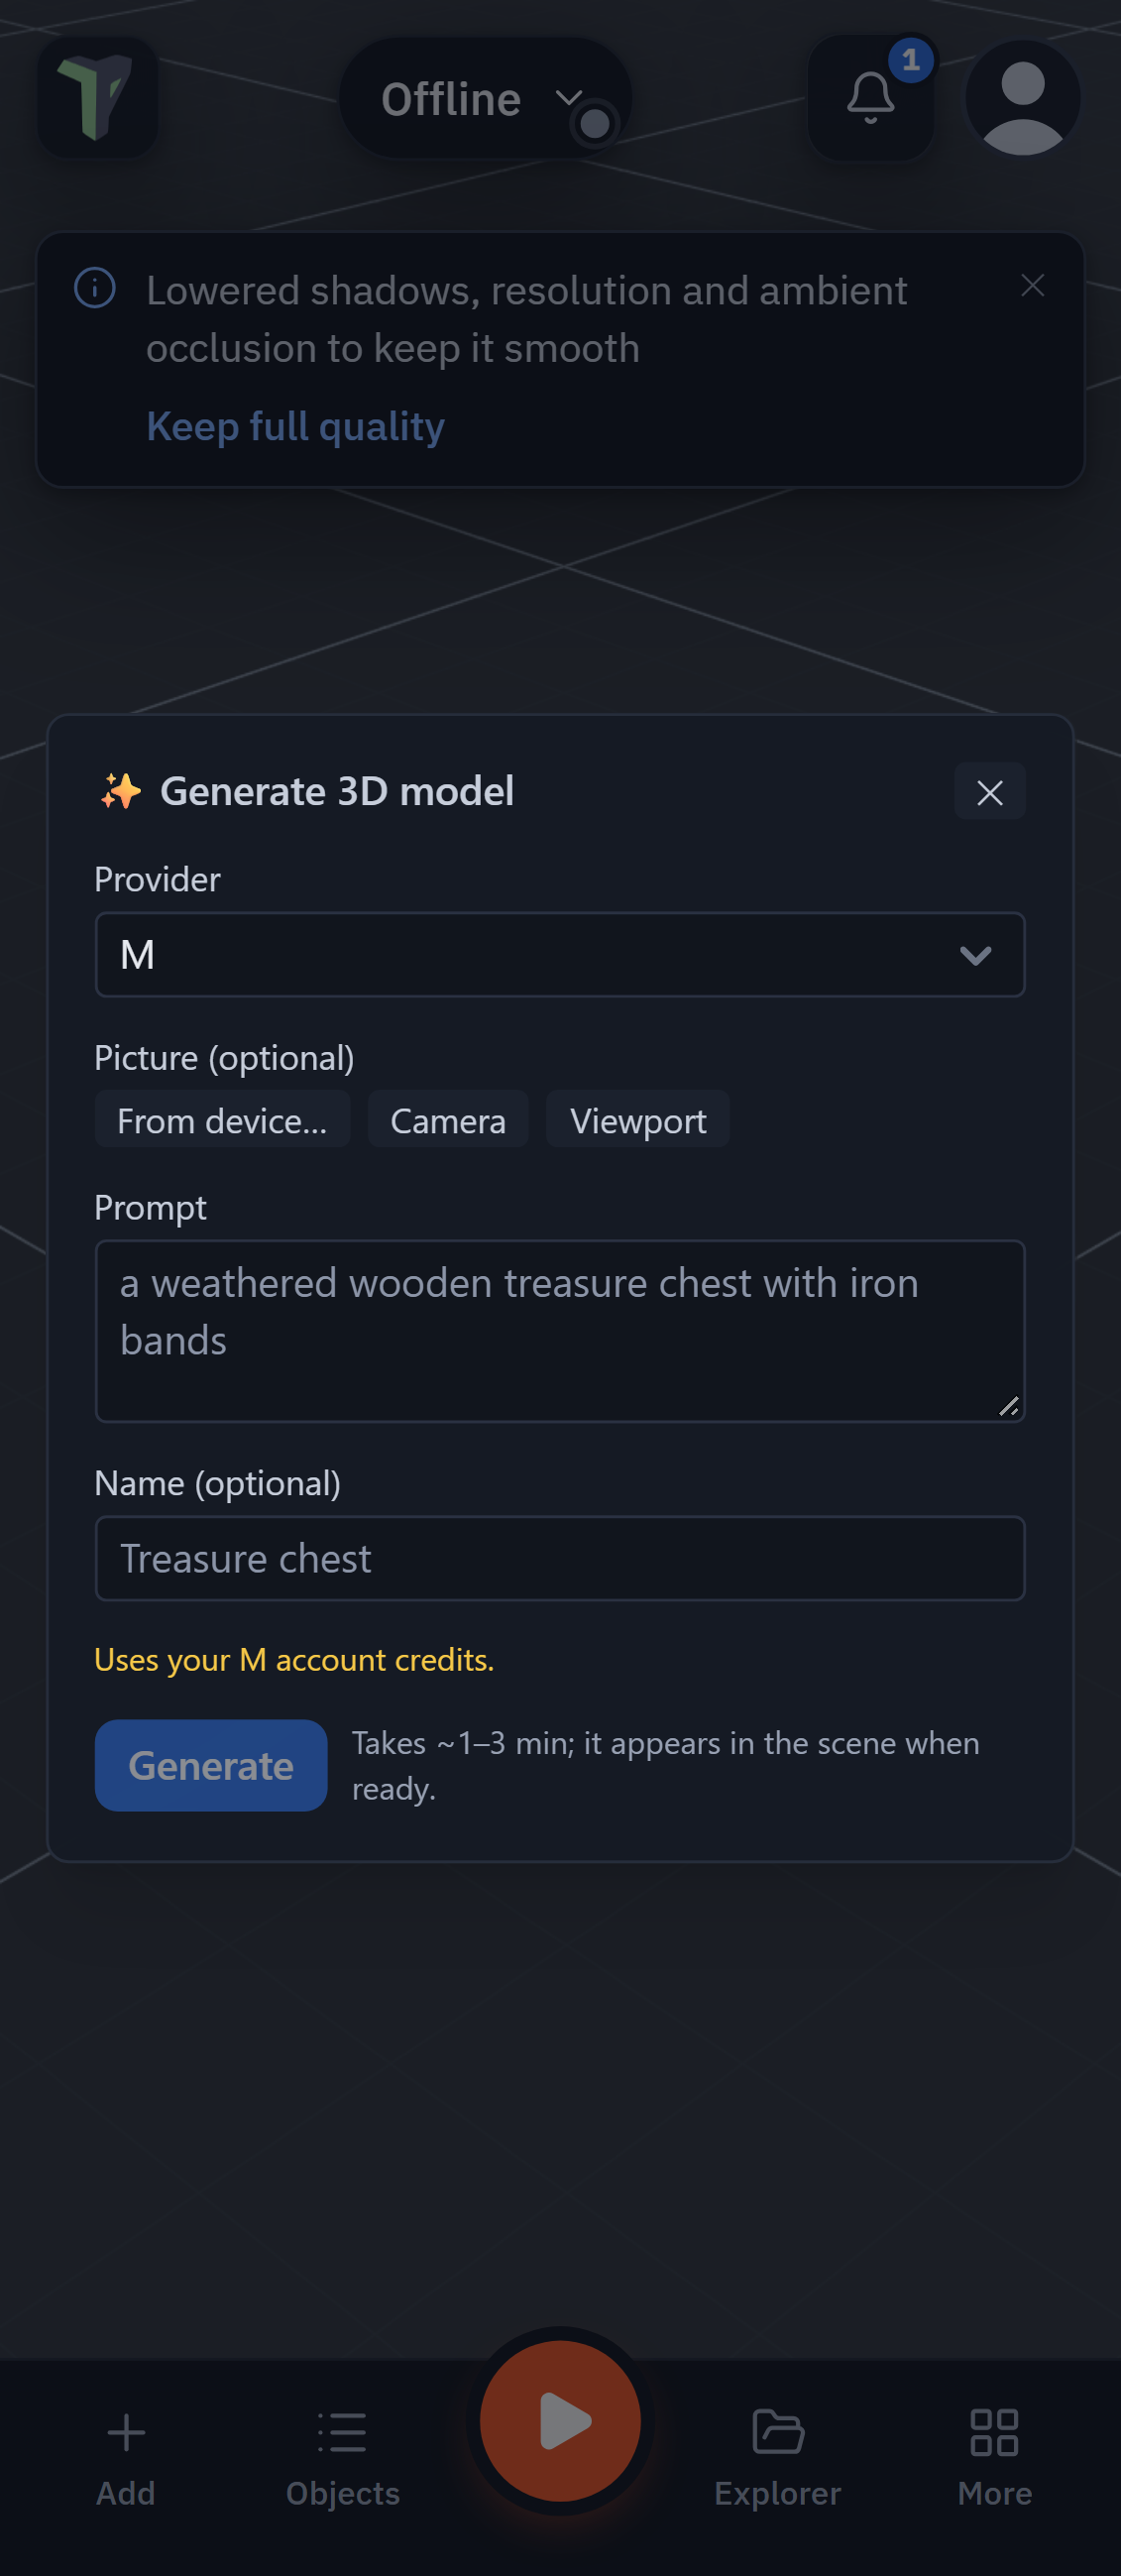
- Picture → 3D model. Start Generate 3D model from a photo, a picture in the Explorer, or a screenshot of the viewport.
- Pictures in the assistant's chat. Attach a picture and ask about it ("what is this?", "build something like this", "make this a 3D model").
- Your own GLSL. Write the vertex and fragment shader of a material yourself, in the shader
editor's
</>view.
Location data (EXIF, GPS) is removed from every picture on your device, before it is sent.
Try it
Templates ▸ Shader garden opens three objects already wearing your own GLSL: sliding stripes,
a breathing glow and a rim light. Select one, open the shader editor and press </>.
Picture → 3D model
- Set up a mesh provider: Settings ▸ Tools & connections ▸ Mesh providers. Meshy (hosted) takes
pictures as it is. A ComfyUI workflow takes them when it has a
{{IMAGE}}placeholder in a LoadImage node (see 3D Generation). - Add menu ▸ Generate 3D model… and pick the picture: From device…, Camera (on a phone), Viewport, or From Explorer…. You can also paste or drop a picture onto the window (a dockable window since 1.65, see The Generate window). In the Explorer, a picture's menu has Make a 3D model….
- A prompt is optional. With Meshy's Refine mode it becomes the texture prompt.
- Press Generate.
Before a picture goes to Meshy
Meshy is a third-party service. Before anything is sent, the app asks:
- what it costs: about 20 credits in Preview mode (untextured) or 30 in Refine mode (textured), from Meshy's price list. Meshy charges what it charges; the number is a guide.
- where the picture goes: to Meshy's servers, with a link to Meshy's privacy policy.
Cancel sends nothing. The same question comes up when the assistant makes a model from a picture you attached. A ComfyUI on this computer or your local network is your own server, so it does not ask; one anywhere else (a rented GPU, a hosted preset) asks before the picture leaves, and gets the picture under a plain name, never your file's.
Limits
| Picture types | JPEG, PNG, WebP, HEIC (HEIC is converted on your device) |
| Size sent | up to 2048 px on the long side and 4 MB, re-encoded on your device |
| Location data | removed before sending |
When it does not work
| You see | What to do |
|---|---|
| No mesh provider set up yet | Press Set one up in Tools & connections. |
| … can't start from a picture | Use Meshy, or add {{IMAGE}} to a LoadImage node in your ComfyUI workflow. |
| Meshy rejected the API key | Check the key in Settings ▸ Tools & connections ▸ Mesh providers. |
| Meshy: out of credits | Add credits on meshy.ai, or switch the provider to Preview, which uses fewer. |
| … did not finish within 10 minutes | Try again, or try Preview mode, which is quicker. |
| … could not be reached | Check the connection and the provider's address. |
Pictures in the assistant's chat
Press + in the assistant's composer (or paste, or drop a picture on the window). Up to 4 pictures a message, each sent as a JPEG of up to 1568 px, location data removed. The + menu says so before you pick anything.
Pictures only go to models that can see them:
| Provider | Pictures |
|---|---|
| Gemini | yes |
| Grok | vision models (for example grok-4); grok-3 models cannot, and the + says so and names one that can |
| Custom (vLLM / OpenAI-compatible) | vision models by name (…-vl…, llava, pixtral, …) yes; an unknown name may try, and if the server refuses, the chat says so and carries on without the picture |
| OpenAI's or Anthropic's own endpoint as a Custom provider | not yet: their presets come in a later release |
The assistant keeps the pictures of the newest two picture turns; older ones become a line saying a picture was there, so long chats stay small. Pictures in the assistant's chat stay on your device's conversation: other people in the session do not see them. Viewers cannot attach pictures.
"Make this a 3D model": with a picture attached, the assistant can start a picture → 3D job with it (the Meshy question above comes first).
Your own GLSL
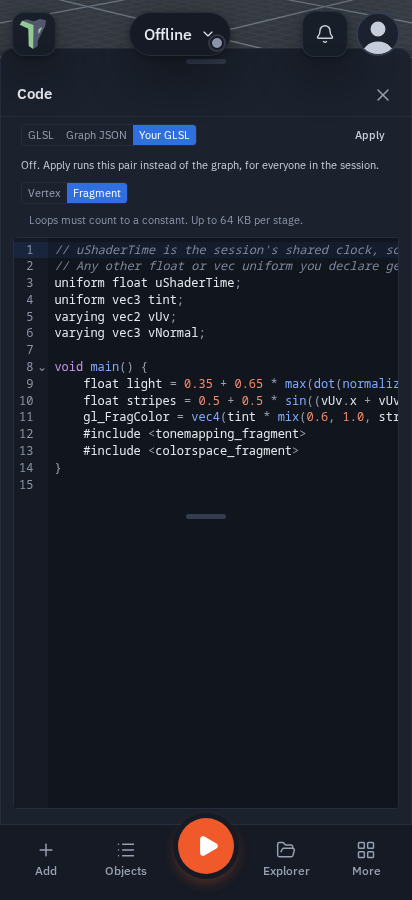
Select an object, open the shader editor, and press </>. Three tabs:
- GLSL: the shader the graph compiles to, read-only, with Copy.
- Graph JSON: the graph as text. Edit it and press Apply; Reload throws your edits away.
- Your GLSL: a vertex + fragment pair that replaces the graph while it is on. Apply turns it on, Use the graph goes back (your text stays).
What you get:
- three.js built-ins:
position,normal,uv,modelViewMatrix,projectionMatrix,normalMatrix,cameraPosition. uniform float uShaderTime;is the session's shared clock, so every peer sees the same frame.- Any other
float,vec2,vec3orvec4uniform you declare gets a field under the code. A Set Shader Uniform node can drive it from a behaviour. - A compile error shows above the code with its stage and line ("Fragment line 2: …"). Press it to go to that stage. The last good shader keeps running while you fix it.
The rules (so a shader cannot freeze anyone's screen)
| Loops | while and do are refused; a for loop declares its int counter and counts up to a number or a #define above it (up to 1024 per loop) |
| Work | one pixel (or vertex) may do about 32768 operations: each call, operator and assignment counts one, a loop counts its body once per step, a function counts what it runs, and both sides of a branch count. A matrix costs its size (a mat4 product counts 64, inverse 256), and so do whole arrays and structs. A 128-step raymarch is about 2000 |
| Arrays | at most 64 elements, one dimension; reading one with a computed index counts its length |
| Parameters | no out or inout parameters: return the value instead |
| Size | 64 KB per stage, plain ASCII outside comments, no backslashes or carriage returns |
| Preprocessor | #define NAME 32 (a name for a whole number, once) and two #includes, after your loops: <tonemapping_fragment> and <colorspace_fragment>. No #if, #ifdef, #undef or other directives |
| Textures | not in v1 (no samplers) |
| Lighting | none built in: a pair is unlit unless you light it yourself; skinned and instanced meshes do not follow it |
| Where | surface materials; post effects show the GLSL and Graph JSON tabs only |
Before a shader runs, each device tests it on its own: it compiles and draws a small frame in a separate worker, with the shader's own field values and a running clock, then the first real frame is timed. A shader that fails, is too slow, or makes the graphics context drop is turned off on that device with the reason and a Try again button. The scene keeps the shader: it is that device's verdict, not everyone's, and the device remembers it until you press Try again.
Where your GLSL runs
| Where | What happens |
|---|---|
| Your own scenes | runs, after the device's test |
| A game you export | runs for players, after their device's test. A shader that came from someone else is switched off in the export, and the export says so (open it in Your GLSL and press Apply to make it yours) |
| Someone else's shader, in a room you join, a community template or a scene file | runs only once your device's test has passed. If your browser cannot run the test, it stays off with a notice and Run it anyway |
| Quest | off by default, because one stuck shader can close the whole browser. Turn it on with Settings ▸ VR ▸ Display ▸ Turn on custom shaders (or the button in the </> view). Each shader is still tested first |
Keyboard and screen readers
The </> tabs, the stage switch, Apply and Use the graph are buttons that take Enter;
Tab moves from the stage switch into the code. Each code box has its own name ("Your GLSL,
fragment shader", "Graph JSON", "Generated GLSL, read-only") and errors are announced.